

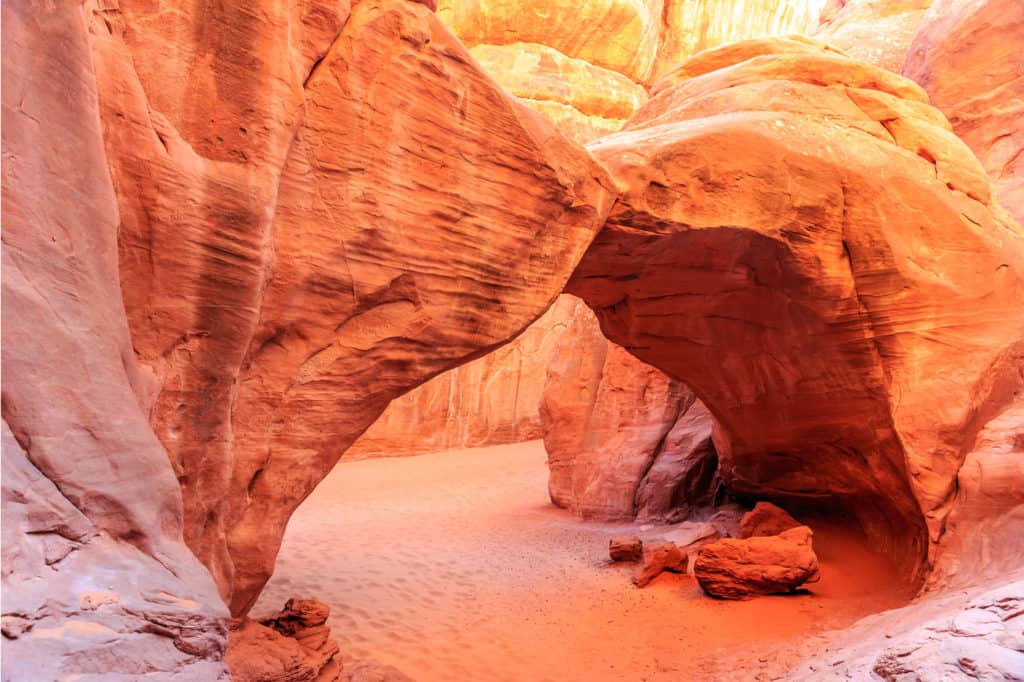
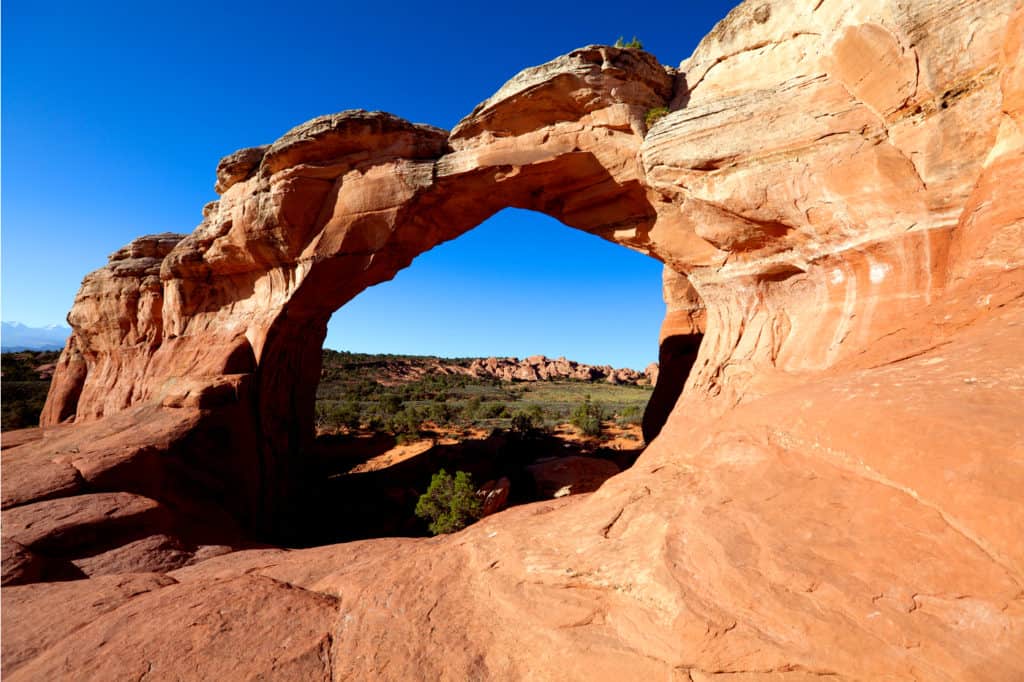
Venture through Arches National Park to uncover towering cliffs, vibrant red rock formations, soaring pinnacles, and, lo and behold, arches. With more than 2,000 arches, this park has the densest concentration of natural arches in the world. You’ll think you’ve stepped into a sandstone sculpture garden rather than a national park.
This 76,000-acre hiker’s paradise is located in eastern Utah along the Colorado River. Each year more than 1.5 million adults and children arrive at Arches to enjoy a wide variety of trails.
The park sees the most visitors during peak season from March-October. This is especially true on holiday weeks such as Easter, Memorial Day, and Labor Day. If you plan to travel during peak season, start your day as early as possible.
Arches is open 24 hours a day, but rangers suggest arriving before 8:00am or after 3:00 pm during peak season. Parking lots at trailheads are often filled before 8:00am, causing temporary restriction. It can take the rangers 3-5 hours to open the park back up so make sure to check on congestion before leaving.
Before Entering the Park
Arches National Park is a “high desert” region meaning the temperatures vary greatly, even within a single day. Make sure to pack lots of snacks and water during the summer months as temperatures often exceed 100 degrees. Late summer also sees storms and flash floods.
The best times to travel to Arches is in the spring or fall because of the moderate temperatures. You’ll also find extended visitors’ center hours in the fall whereas during the winter, ranger programs end, and the park becomes very peaceful. The weather can be quite cold with highs ranging from 30-50 degrees and even chillier lows. Small amounts of snow and ice can make the local roads and trails impassable.
Regardless of the time of year you travel to Arches National Park, make sure to plan ahead for permits and extra expenses. In addition to the park entrance fee, guests must purchase additional permits if they want to camp or do self-guided exploration. These are often fully booked up to six months in advance and require advanced planning. Similarly, ranger led guides can be purchased a week before your trip. However, rangers are not available in winter.
Camping permits are available for Devil’s Garden which has fifty camp sites. Set up camp underneath the darkest skies in the contiguous United States to enjoy the most breathtaking views of the Milky Way. Book in advance or enjoy alternative campsites or hotels in the nearby city of Moab (located five miles from the park entrance).
Day 1
The simplest way to get into Arches is via US Highway 191. This will take you to the Arches entrance road. This will quickly become Main Park Road. Once there, all you’ll have to do is follow this aptly named road throughout the park, as there are really only two secondary road, Windows Road and Delicate Arch Road. You won’t have to travel up the Main Park Road for long before you get to your first stop.
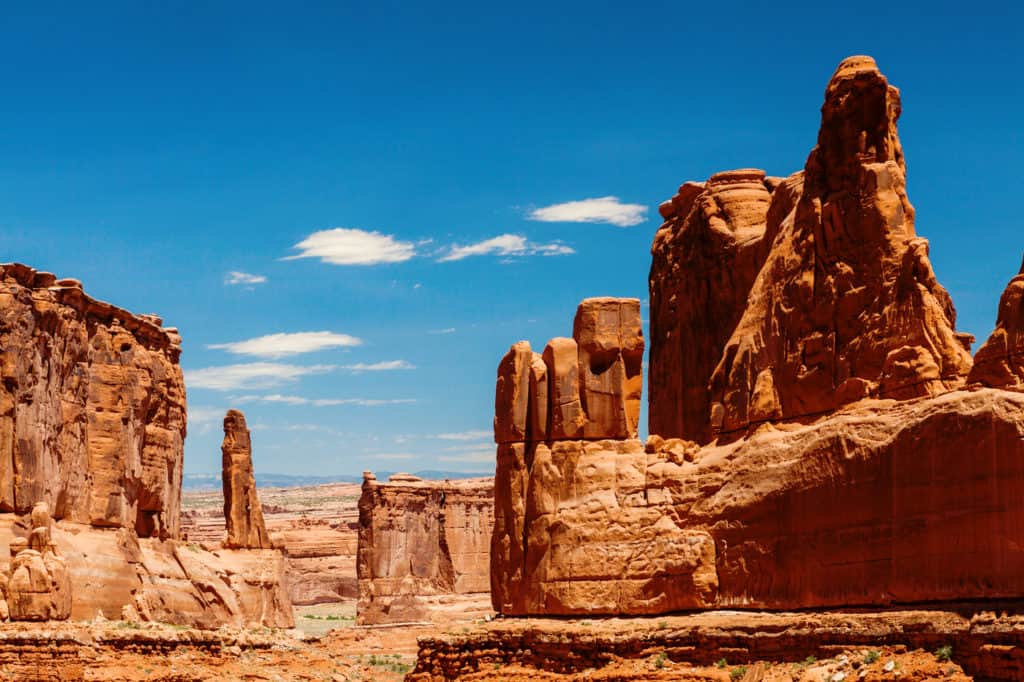
Stop 1: Park Avenue Trail
Length: 1.8 miles
Elevation Gain: 298 feet
Type: Out and back
Difficulty: Easy
Estimated Time to Complete: 1 hour
No, you haven’t gotten lost and ended up in Manhattan. This trail is named after the viewpoint that is found off to the right just after you leave the trailhead and not after the famous New York road. This is an exposed trail with little shade. If you’re there during the warmer months, you may want to be aware of your water supply, even on shorter hikes such as this one. The turnaround point is just before you reach Main Park Road again and the Courthouse Towers Trailhead.
Stop 2: The Tunnel
Length: 3.2 miles
Elevation Gain: 206 feet
Type: Out and back
Difficulty: Moderate
Estimated Time to Complete: 1 hour and 30 minutes
Continue up the Main Park Road past the Tower of Babel and look for parking just past where the road crosses over the Courthouse Wash. Parking should be available on the left side of the street.
This trail will be a bit more strenuous than the last, but with minimal elevation gain. This quiet trail offers plenty of scenery and the trails serenity makes it likelier you’ll catch a glimpse of some the wildlife of Arches National Park. Hikers sometimes mention difficulty following the trail. While most people shouldn’t have trouble, those not confident in their directional abilities may want to have a map with them just in case. Regardless of your navigational skills, the tunnel that the trail is named for is a can’t miss Arches spot!
Stop 3: Ring Arch
Length: 3.3 miles
Elevation Gain: 200 feet
Type: Out and back
Difficulty: Easy
Estimated Time to Complete: 1 hour and 30 minutes
Ring Arch shares the same first half mile or so with The Tunnel. If you’re interested in a two birds, one stone hiking plan, you can combine the two trails. This isn’t highly recommended though as that initial half mile is the only similarity and you’ll add an extra 2 miles or so onto your hike at once. If you don’t mind the added difficulty or you started late, this is an option for you.
If a late start is your concern, this trail tends to be less trafficked, so you shouldn’t expect to be slowed by crowds. As with the last trail, consider having a map with you just in case you get confused by how the trail is marked.
When planning where you’re going to spend the night, note that Arches only has one campground in the park itself. While it does have fifty available spots, they aren’t easy to get unless you reserve well in advance. It will save you some driving in the morning to get a spot at Devil’s Garden, but it won’t be inconvenient to stay in nearby Moab. If staying outside of the park, you will want to get up earlier to beat congested traffic trying to enter.
Day 2
At roughly the halfway point on Main Park Road, you’ll find today’s first stop! Depending on whether you camped in the park, you’ll want to adjust your arrival time accordingly. Don’t forget to check for traffic congestion ahead of time if re-entering the park. If coming from Devil’s Garden, look for the road to the first trailhead to be just past Windows Road. If you’re re-entering the park, it’ll be just before Windows Road. You should be able to park by the trailhead, but you have the option to park on a pull-off by the Main Park Road as well.
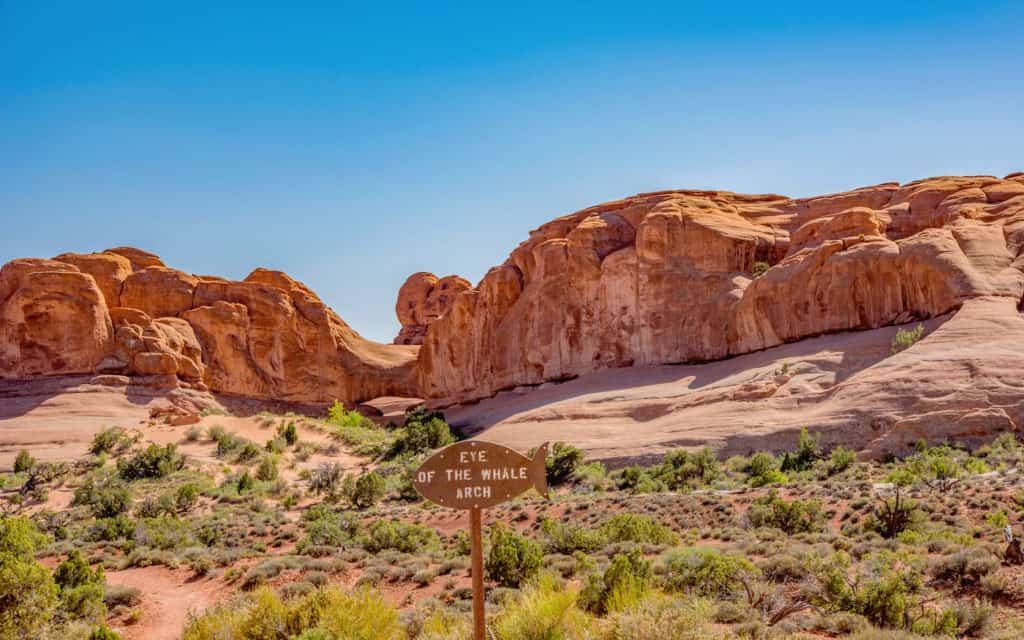
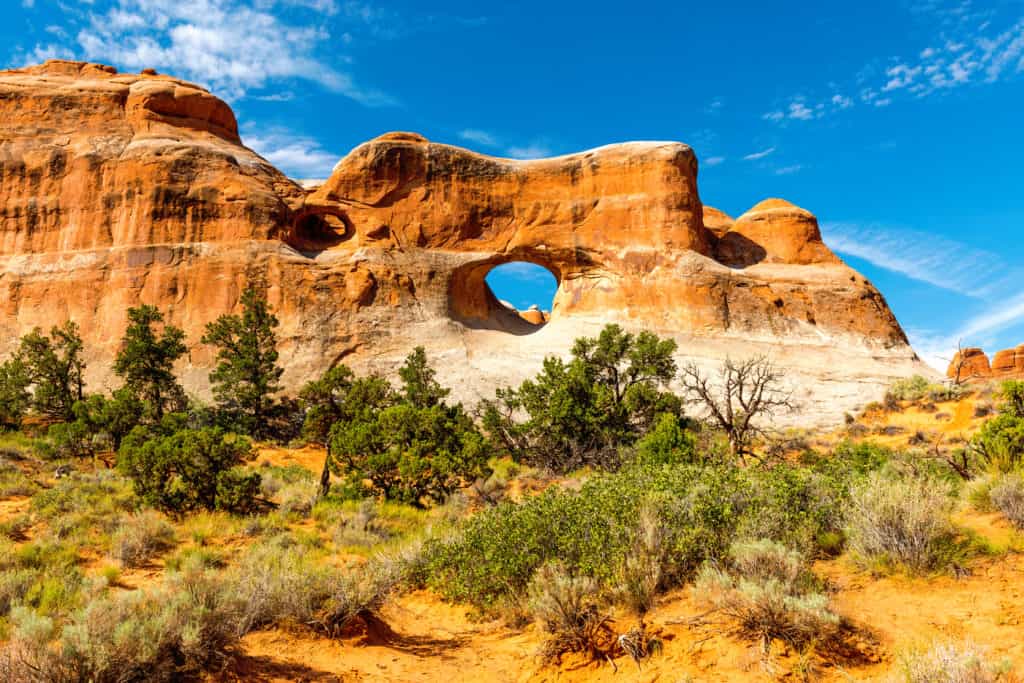
Stop 1: Eye of the Whale Trail
Length: 5.1 miles
Elevation Gain: 410 feet
Type: Out and back
Difficulty: Moderate
Estimated Time to Complete: 2 hours and 20 minutes
Your first hike of the day has some rolling ups and downs with the payoff, Eye of the Whale Arch, at the turnaround point. This trail is used by both hikers and off-roaders, so be aware that you may see some people driving this trail. If you’re an off-road enthusiast, then you know the Utah desert is a paradise for those so inclined.
This is a moderate enough trail that less experienced off-roaders can tackle it, and potentially even beginners who are enthusiastic enough. This is, of course, up to your skill level and risk tolerance. If you opt to hike it, you won’t miss out on any of the views or rewards of this trail though!
If you parked at the pull-off, you could make a quick trip to check out Balanced Rock and take some photos before or after your hike!
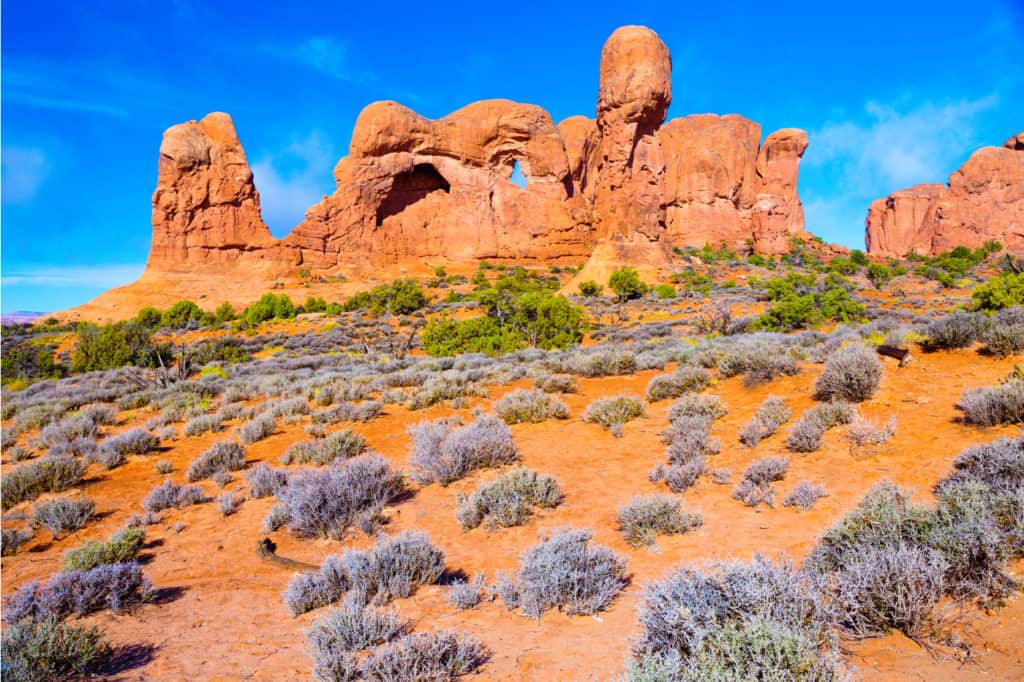
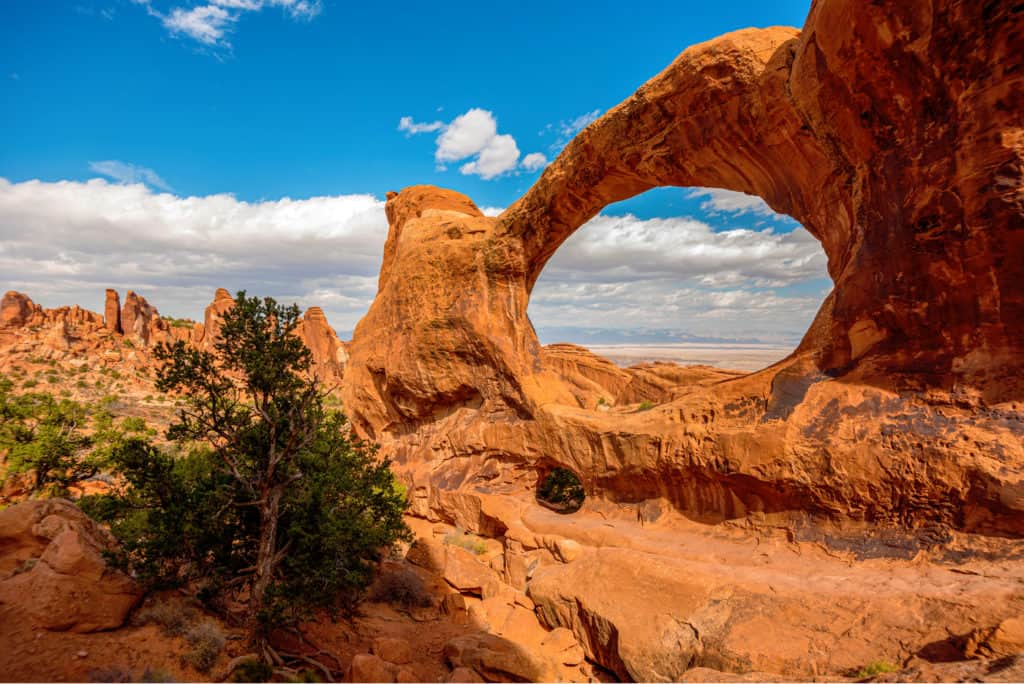
Stop 2: Cove of Caves via Parade of Elephants
Length: 1.1 miles
Elevation Gain: 272 feet
Type: Out and back
Difficulty: Moderate
Estimated Time to Complete: 45 minutes
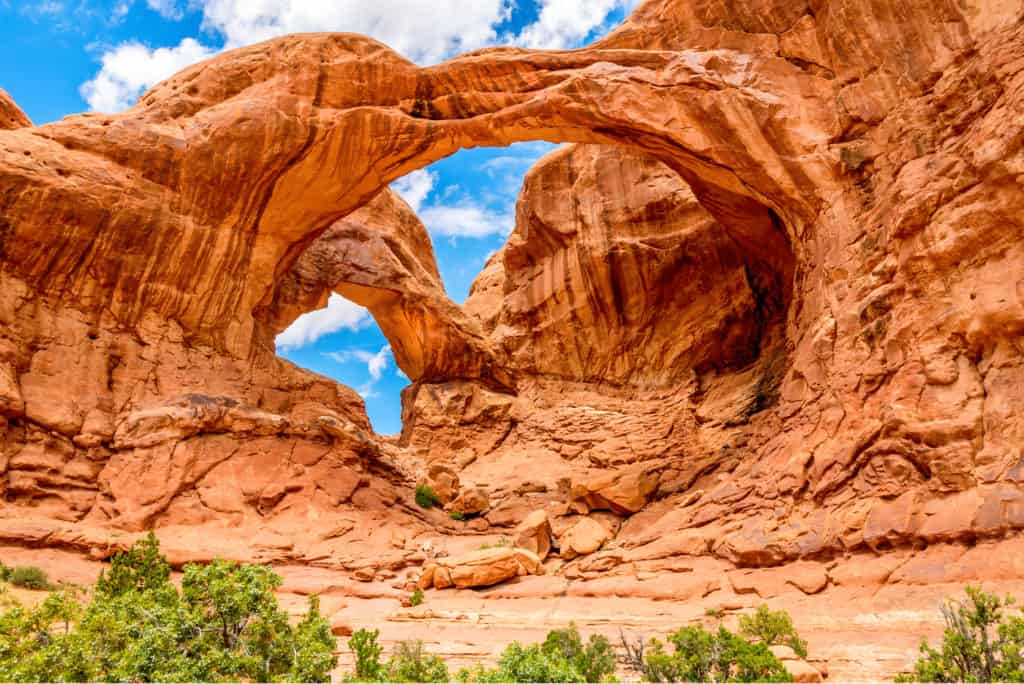
Now you’ll head onto Windows Road, which won’t be a far drive from Eye of the Whale. Take Windows Road to the end and you’ll find a loop with parking by the trailhead. You’re looking for the Double Arch Trailhead and not The Windows Trailhead.
Cove of Caves is lightly trafficked but has three distinct spots to stop for photos. Since you shouldn’t expect many hikers to be on the trail with you, you’re welcome to take your time with your stops. Past Double Arch, about 0.3 miles in, the trail gets a bit vague. While it isn’t well-maintained, those interested in bushwhacking will enjoy hiking to the Cove Arch (about another 0.3 miles). If things change and you see signs posted prohibiting you from passing Double Arch, the shortened version of the trail is still very enjoyable.
Please don’t ignore posted warnings as they’re there for the protection of the environment and the animals that live there. If there are no posted prohibitions, however, enjoy the full version of the trail and take lots of pictures of Cove Arch!
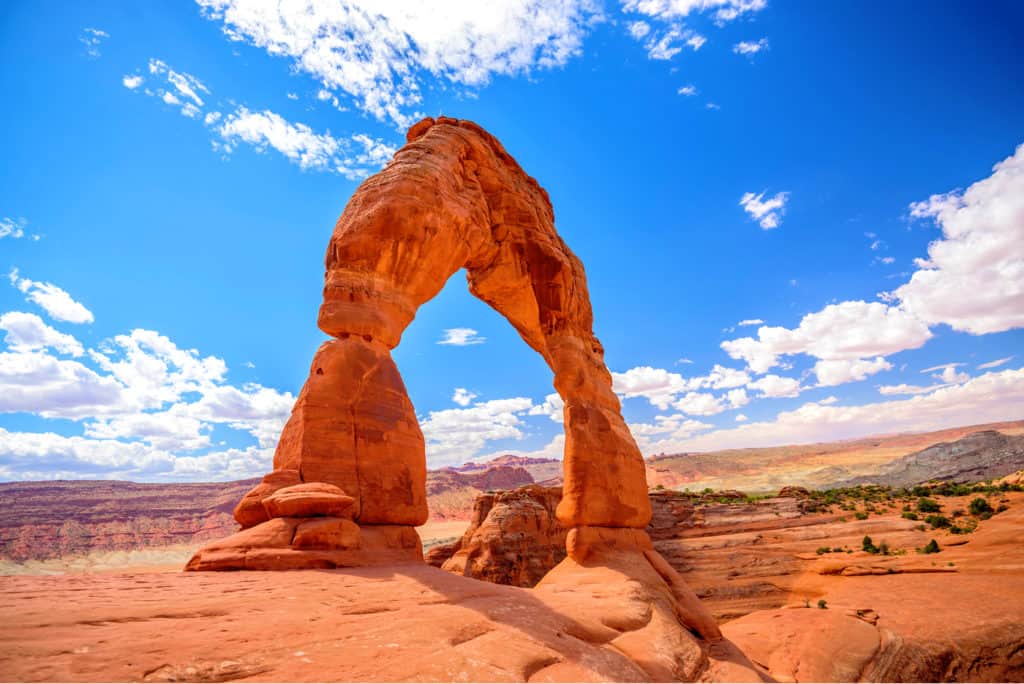
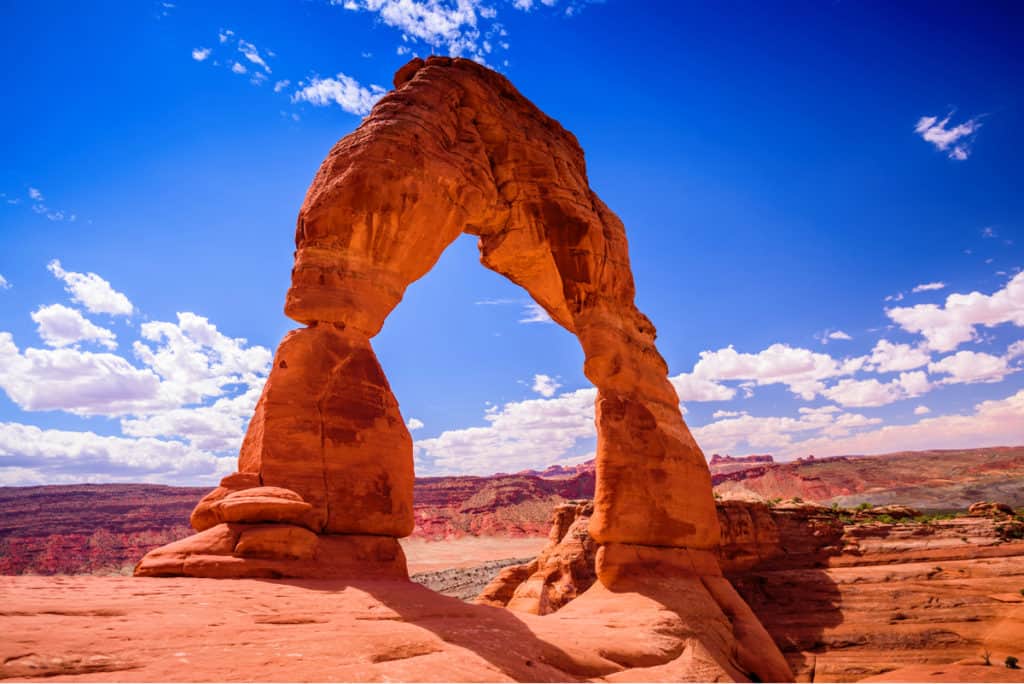
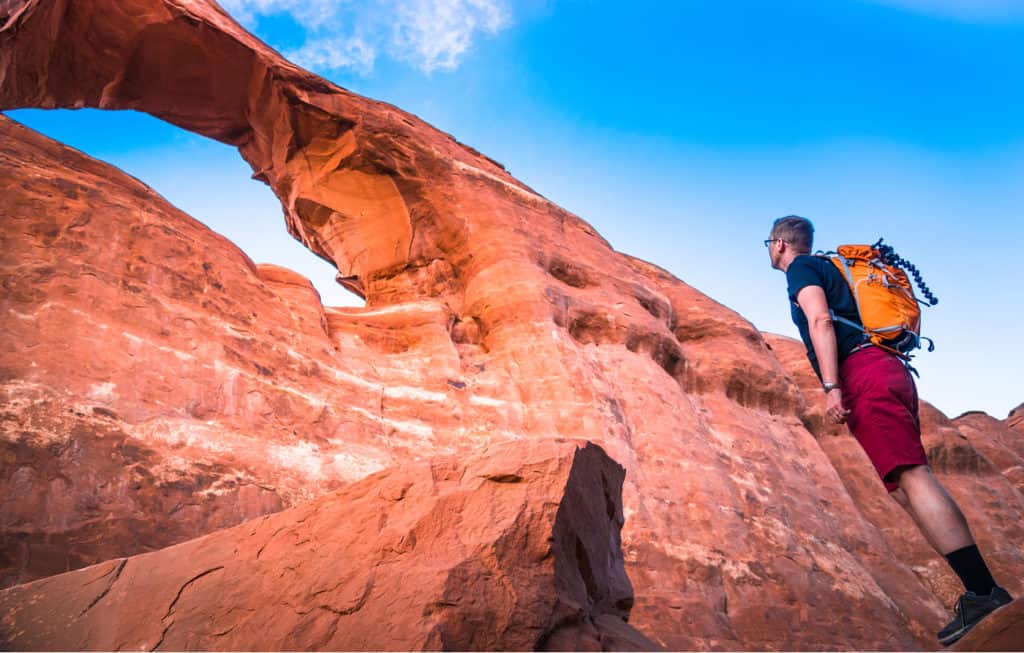
Stop 3: Delicate Arch Trail
Length: 3.2 miles
Elevation Gain: 629 feet
Type: Out and back
Difficulty: Moderate
Estimated Time to Complete: 1 hour and 45 minutes
Continue to head up Main Park Road until you see the turn for Delicate Arch Road. The trailhead is at the first main parking area (there is a parking area that you’ll see almost immediately as you turn onto Delicate Arch Road). There is also a good amount of parking on both sides of Delicate Arch Road near the trailhead, so you should be able to find a spot.
Delicate Arch Trail is one of the most popular trails in the park, so you may be best served going later in the afternoon as some of the crowds have died down. This could be enjoyable as a sunset hike as well, but make sure you finish the trail while there’s still light as this trail has patches of slickrock. Slickrock shouldn’t be a concern, assuming there haven’t been any recent heavy rains, but it’s something to be aware of. About 0.5 miles into the trail, you’ll come upon a patch of it. As long as you have good shoes and look where you’re walking, you’ll navigate this spot easily.
There are a few great photo spots on this trail, with the main being at the turnaround point of Delicate Arch itself. Just past Salt Wash (just a bit past the trailhead itself) you’ll see a left turn onto the Petroglyph Trail. While this isn’t a part of the Delicate Arch Trail itself, you can see some unique Ute Rock Art and learn more about the people who originally lived on this land. This will add less than 0.5 miles to your hike and the loop puts you back onto Delicate Arch Trail at the end.
Most of the elevation gain is from miles 0.5 to 1.5, with the rest being either downhill or flat. Be aware of the slickrock on the way back too!
Day 3
The final day has the most hikes of any of the three days, so feel free to adjust the itinerary to fit your schedule best. You can cut out a couple of the shorter hikes if you need to, but the first and last hikes on this day are a must!
If you got a spot at Devil’s Garden Campground, you’ll be right by the start of today. If not, you’ll definitely want to get in ahead of traffic congestion as you’ll need to drive to the furthest part of the park.
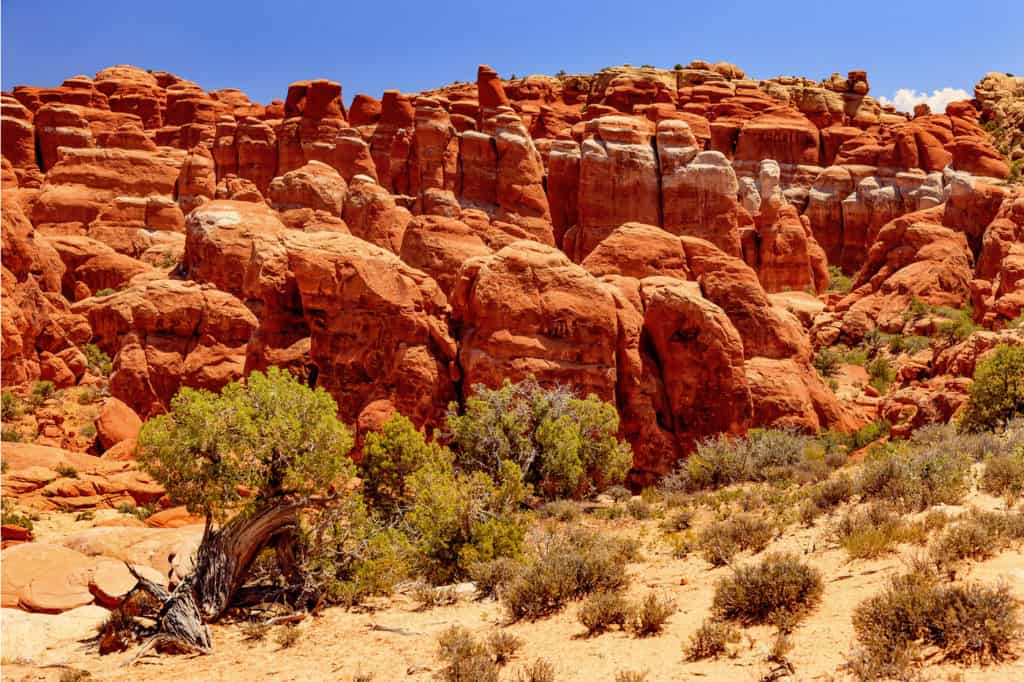
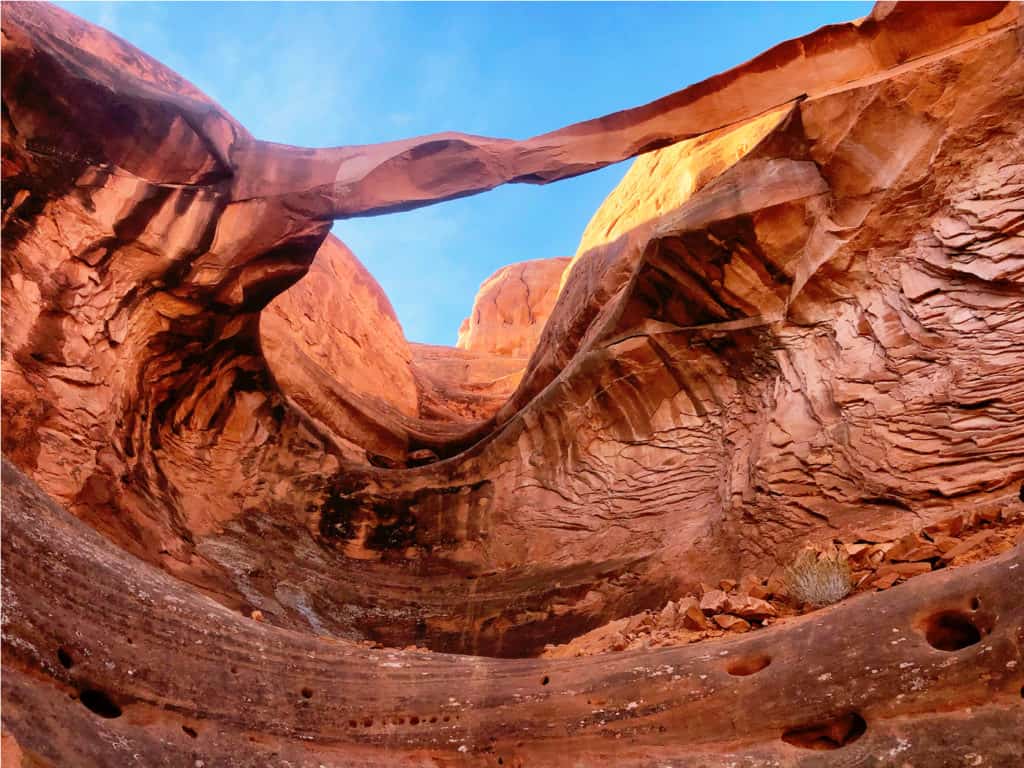
Stop 1: Fiery Furnace and Surprise Arch
Length: 1.7 miles
Elevation Gain: 387 feet
Type: Out and back
Difficulty: Moderate
Estimated Time to Complete: 1 hour
This trail starts with a quick walk to the Fiery Furnace Viewpoint before turning around and heading onto the larger loop. This is a trail with a name recognition and lots of hype surrounding it, so expect crowds. It does, however, live up to the hype! There are some fun scrambles and narrow walkways to adventure through, so if you’re looking for an invigorating challenge, this is it!
This trail has a unique easter egg. There are 24 arrows that you can follow throughout the loop and see how many you can find. If you follow the trail counterclockwise, the arrows will be guiding you. You can walk the other way, against the arrows, but following the arrows is what makes the trail unique!
Stop 2: Sand Dune Arch to Broken Arch Loop
Length: 2.8 miles
Elevation Gain: 321 feet
Type: Loop
Difficulty: Moderate
Estimated Time to Complete: 1 hour and 20 minutes
Continue up Main Park Road until you see a pull-off on the right side with trailhead parking. The first part of the trail is an immediate right towards Sand Dune Arch. This on its own is the Sand Dune Arch Trail, so if you’re short on time, this will save you about an hour. You won’t get the full experience of this trail skipping out on Broken Arch Loop and missing Broken and Tapestry Arches, but it’s still enjoyable.
Technically this trail is a combination of a loop and an out and back as you walk about 0.5 miles out before you get to Broken Arch Loop, so don’t let the name confuse you.
Stop 3: Skyline Arch Trail
Length: 0.4 miles
Elevation Gain: 36 feet
Type: Out and back
Difficulty: Easy
Estimated Time to Complete: 15 minutes
Continuing up Main Park Road takes you to the Skyline Arch Trailhead on the right side. This is a beautiful trail, although it is quite short at just under half a mile. If you want to skip a trail to save time, consider going straight to stop 4. If you have a full day though, the Skyline Arch is a fun photo spot!
Stop 4: Double O Arch Trail
Take Main Park Road to the end and turn right onto the loop. You’ll pass a parking area, but continue around the loop and look for the parking area near the Devil’s Garden Trailhead.
While not the easiest trail, this is one of the most rewarding by far. There is some rock scrambling to be aware of, but by this point you’re a pro anyway! About 0.2 miles into the trail, there is a fork. If you take the right fork, you hop onto Pine Tree Trail and find another fork quite quickly. The right fork takes you to the Tunnel Arch Viewpoint and the left to the Pine Tree Arch Viewpoint. If you have time to add these two, it’s worth the extra hike!
Continuing down the trail you’ll see viewpoints for Landscape Arch and Wall Arch, as well as the Black Arch Overlook and the trail’s namesake arch. If you’re looking to encapsulate Arches National Park into one hike, you’ve saved the best for last! From there, it’s easy to follow Main Park Road back towards the park’s exit and right onto US Highway 191.
Hopefully this itinerary has helped inspire your next adventure to the high desert of Arches National Park. We can’t wait to hear all about it!


No Comment